The following changes have been made in this release:
New operating system profiles in this release
FreeBSD 9 and FreeBSD 9 rescue
The newest version of this popular operating system.
The official installation procedure has been patched slightly to support:
- Installation using the ZFS filesystem instead of UFS
- Support for ZFS mirroring (software RAID 1)
- Partition alignment and filesystem optimization for hard drives with 4k-sectors
- VirtIO support for improved performance when run in virtual environments
Be aware that FreeBSD does not allow you to login as the root user directly over SSH. So when provisioning FreeBSD servers always make sure you create a “regular user” as well.
The rescue profile does allow you to login as root over SSH.
Proxmox VE 2.0 (beta)
Proxmox VE is easy to use KVM virtualization software that is currently in beta.
Not only do we support provisioning dedicated servers with the Proxmox management server software.
We also support creating Proxmox virtual machines right from our webinterface:
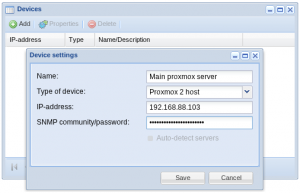
- First add your Proxmox server to the system under “start” -> “devices”, specifying the IP-address and admin password of your installation.
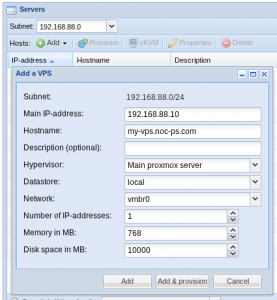
- After the management server is in the system, you can create new virtual machines in the “server” window. Simply press the down arrow symbol right to “Hosts: Add” and select “VPS” from the drop-down menu.
oVirt
oVirt is the open source flavor of Red Hat Enterprise Virtualization.
Another KVM virtualization solution.
After installing this profile, go to: http://ip-of-server:8080/ to complete configuration.
Similar to Proxmox, you can create virtual servers straight from the NOC-PS webinterface, provided you have setup everything correctly (datacenter, cluster, hosts and storage settings), and added the server to the system under “start” -> “devices”
Retiring old operating system profiles
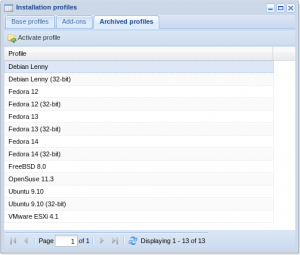
This release introduces a new section in the “profiles” window, called “archived profiles”
Old operating system profiles that you have not used recently and are end-of-life are moved there.
If necessary you have the option to reactivate the profiles, but we strongly discourage it, as most vendors do not release (security) updates for versions that are end-of-life.
KVM-over-IP console support
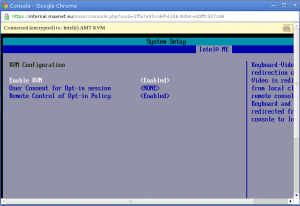
We now support viewing the console of physical servers supporting Intel AMT 7.0, as well as virtual machines running under Citrix Xenserver and oVirt.
Our console is based on code of the noVNC project. All you need to be able to use it is a modern web browser such as Google Chrome that supports HTML 5 canvas and websockets. No additional plug-ins are necessary!
Unfortunately IPMI based servers are not supported at this stage. The problem is that the protocol those use is proprietary and differs by brand and model server. As long as vendors do not open up their specifications, we are unable to support their hardware. So for now you can only use this feature with AMT based servers and virtual machines.
SSL
The webinterface now shows a warning if you are not connecting through SSL.
In addition we recommend every customer to install a SSL certificate issued by a Certificate Authority, instead of using the default self-signed one. This has become more important since this release, because some browsers may refuse to initiate websocket sockets (used by our new KVM-over-IP console) if you do not have a trusted SSL certificate installed.
To install a new SSL certificate:
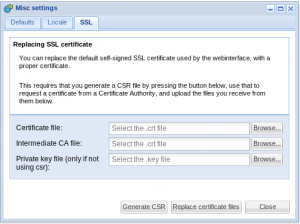
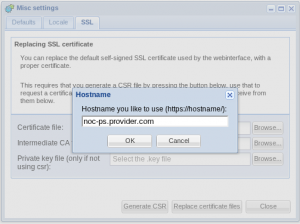
- In the NOC-PS webinterface, go to “start” -> “misc settings” -> tab “SSL”. Press the “generate CSR” button. Enter the hostname you plan to use to access NOC-PS. Be aware that it is not possible to request a certificate for an IP-address.
- Create a DNS record for the hostname, so that it points to the IP-address of the NOC-PS virtual appliance.
- Send the CSR file that was generated at step 1 to a certificate authority. One certificate authority that issues certificates free of charge is: https://www.startssl.com/
- After you receive your certificate from the CA, you must upload the files to the NOC-PS webinterface, and click the “Replace certificate files” button. In the case of StartSSL you also need to upload the intermediate CA certificate sub.class1.server.ca.pem in addition to your personal certificate.


