Installing the module files
File download: NOC-PS-Blesta-Module-4.zip for Blesta v3.x
To install the files simply unpack the contents of the .zip file to the root folder of your Blesta installation.
Configuring the Blesta module
- In the Blesta admin panel: at the top right of the screen go to “settings” -> “modules”
- At the left of the screen under the heading “modules” click on “available”
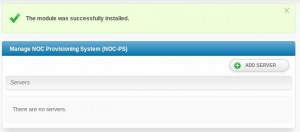
- Go to “Nocprovisioning” and click on the “Install” button.
- Click on “add server”
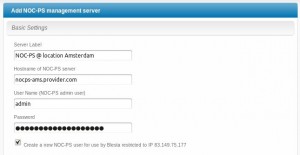
- enter a name of your choice, and the hostname, admin username and password of your NOC-PS appliance.
Notes:
The username supplied can be of any NOC-PS user that has administrative privileges.
If you leave the “create new user for Blesta” checkbox checked it will automatically create a new user name for Blesta on the NOC-PS server with a random password, and an IP-address restriction limiting the use of the account to the IP-address of the webserver running Blesta.
If you wish to offer VPS console functionality to your customers, it is important to make sure that you enter the HOSTNAME of the NOC-PS appliance in this screen and NOT the IP-address.
Creating dedicated server products
- Go to “packages” -> “groups” -> “create new group”
- Create a new dedicated server group here.
- Click on “packages” -> “browse” -> “create package”
- Give the product a name, and under “module” select “NOC provisioning”
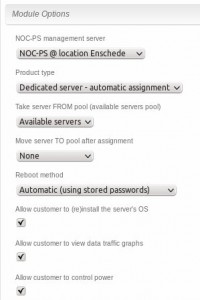
- Select which product type you want
Product type: Dedicated server – manual assignment
Once the order has been placed by the customer, you can manually approve it, and enter the IP-address of the server you wish to assign to the customer. The server must already be registered in the NOC-PS system.
Product type: Dedicated server – automatic assignment
It is also possible to let the module automatically assign the customer a server out of a predefined pool of available servers. Once a server has been assigned it will be removed from the available servers pool and moved to a different pool.
In the Blesta module you specify the name of the pool to take the server from, and the name of the pool to move it to.
You can also select the “reboot method” you want your customers to use.
- Automatic: Reboots can be performed automatic using a remote power switch associated with the server, or an IPMI password you saved in the NOC-PS server settings.
- IPMI: for added security the user will be prompted for the IPMI password of the server. In that case it is not necessary to save passwords in the NOC-PS system, but it does require that you let the customer know the IPMI password, e.g. by phone.
- Manual: reboots are done manual, outside of the module.
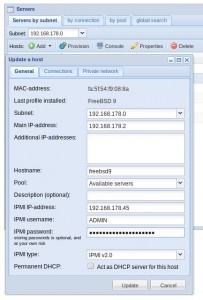
If you wish to use automatic reboots, go to “start” -> “servers” in the main NOC-PS webinterface, select each server, and click “properties” to enter the IPMI passwords. Or go to the “connections” tab to associate a remote power switch port to the server, if you wish to use that as reboot method.
Product type: VPS
The module can automatically create a VPS for the customer.
Enabling VPS support in NOC-PS
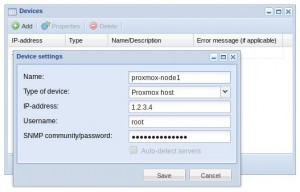
This requires that you add the connection information of your hypervisor nodes (running Citrix Xenserver, Proxmox VE, VMware vSphere or oVirt) to the main NOC-PS admin webinterface first under the option “start” -> “devices” -> “add”.
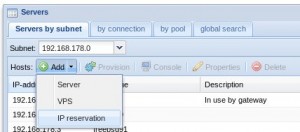
Also make sure that in the main NOC-PS webinterface under “start” -> “servers” you mark all IP-addresses in the subnet that are in use by other servers as unavailable. Either by adding those servers to NOC-PS, or creating an “IP reservation”.
Blesta VPS package settings
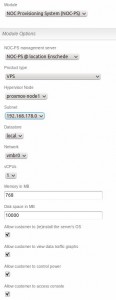
You can then select the hypervisor node in the Blesta package settings, and enter the specifications of the VPS like amount of memory and disk space.
Once the customer places its order, it will automatically take an available IP-address out of the “subnet” you select, and assign it to the VPS created.
Client area functionality
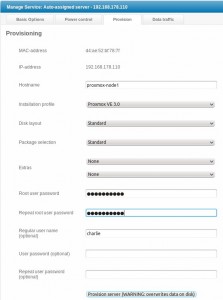
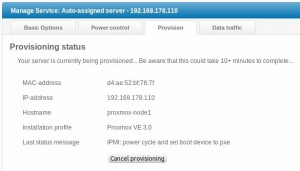
Once the order has been approved, the customer can install the operating system of his choice to the server in the client area.
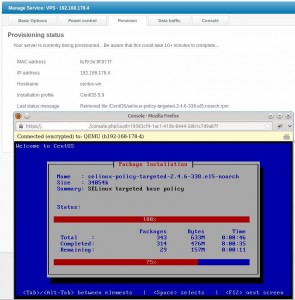
The status of the installation can be monitored.
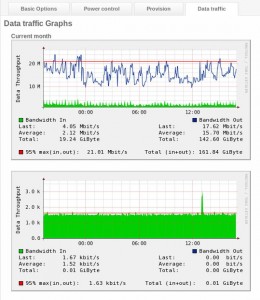
Data traffic can be viewed provided the server is connected to a managed Ethernet switch
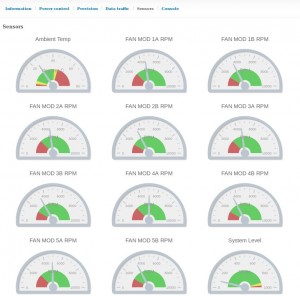
Server health sensor information -such as the system’s temperature and fan speeds- can be displayed, provided the server has IPMI support.
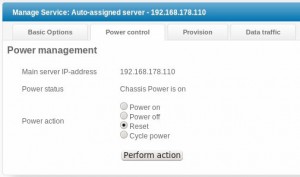
And the customer can power on/power off/reset the server provided it has an IPMI/BCM/iLO/DRAC/AMT management chip, or is connected to a remote power switch.
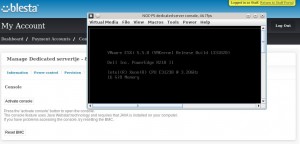
KVM-over-IP console support
Various console technology is offered.
For Dell servers featuring DRAC Enterprise and Supermicro X9/X10 IPMI servers a Java webstart console is offered.
And for Xenserver, Proxmox and oVirt VPSes as well as Intel AMT servers, a HTML 5 console is offered that only requires a recent browser, and not any additional plug-ins.
This however does require that the NOC-PS server has a proper SSL certificate installed issued by a certificate authority. This is because HTML 5 websockets are used for communication and some browsers do not show a warning message if the SSL connection fails certificate checks (like with normal websites), but instead deny the connection straight away.
You can install a SSL certificate in NOC-PS by going to “start” -> “misc settings” in the main webinterface.


